Install Splunk App and Add-on
This section describes installation, configuration, and user instructions of Splunk’s solution components. They are: NetFlow Analytics for Splunk App (https://splunkbase.splunk.com/app/489/) and Technology Add-on for NetFlow (https://splunkbase.splunk.com/app/1838/). The App and Add-on are designed to work together.
The App expects data in sourcetype=flowintegrator.
Installing into a Single Splunk Server
Step 1: Install the App and Add-on
Step 2: Create the Splunk data input
-
Create the $SPLUNK_ROOT/etc/apps/TA-netflow/local/inputs.conf file, and add the following lines to it:
[udp://10514]
sourcetype = flowintegrator -
By default, NetFlow Optimizer events will be stored in the main index. In case you want to use another index, for example flowintegrator, please create the $SPLUNK_ROOT/etc/apps/TA-netflow/local/indexes.conf file, and add the following lines to it:
[flowintegrator]
homePath    = $SPLUNK_DB/flowintegrator/nfi_traffic/db
coldPath    = $SPLUNK_DB/flowintegrator/nfi_traffic/colddb
thawedPath  = $SPLUNK_DB/flowintegrator/thaweddb
In that case make sure your $SPLUNK_ROOT/etc/apps/TA-netflow/local/inputs.conf file contains the following:
[udp://10514]
sourcetype = flowintegrator
index = flowintegrator
Also, in the NetFlow Analytics for Splunk App (netflow) you need to create $SPLUNK_ROOT/etc/apps/netflow/local/macros.conf file containing the following. Edit this file to match your Splunk installation.
[netflow_index]
definition = (index=main OR index=flowintegrator) sourcetype=flowintegrator -
Restart Splunk
Installing into a Distributed Splunk Environment
If you have a Splunk distributed environment (separate search heads / indexers / forwarders), install the NetFlow Analytics for Splunk App on the search heads. Install Add-on on the search heads and indexers/heavy forwarders.
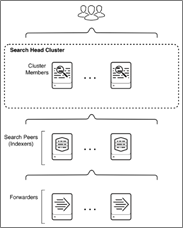
There are three ways to ingest NetFlow Optimizer events into Splunk:
- NFO sends events directly to the Splunk indexer
- NFO sends events directly to the Splunk Universal Forwarder (they could be installed together or on separate machines)
- NFO sends events to syslog-ng or rsyslog, and the Splunk Universal Forwarder sends them to Splunk indexers
Configure Universal Forwarder
Input Create or modify the %SPLUNK_HOME%/etc/system/local/inputs.conf file as follows. In general, there are two options, either to listen directly for netflow events on a specific port or optionally to monitor files created by syslog-ng or rsyslog.
Receiving Syslogs Directly from NFO (UDP port 10514)
Add the following lines to the inputs.conf file and modify it for your netflow index, for example:
[udp://10514]
sourcetype = flowintegrator
index = flowintegrator
Configuring Universal Forwarder with syslog-ng or rsyslog
In this scenario syslog-ng or rsyslog are configured to listen to syslogs sent by NFO on a UDP port 10514. Syslog-ng or rsyslog are usually writing the logs into configurable directories. In this example we assume that those are written to /var/log/netflow.
Add the following lines to inputs.conf file and modify it for your netflow index, for example:
[monitor:///var/log/netflow]
sourcetype = flowintegrator
index = flowintegrator
It is very important to set sourcetype=flowintegrator and to point it to the index where NetFlow Analytics for Splunk App and Add-on are expecting it.
Configure Universal Forwarder Output (Target Indexers)
During the installation of the Universal Forwarders, a Receiving Indexer can be configured, as it can be seen here:
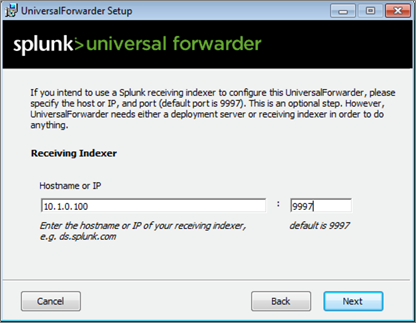
It is an optional step during the installation. If it was not configured or if load balancing is required, additional Receiving Indexers can be added later by adding to the %SPLUNK_HOME%/etc/system/local/outputs.conf file:
[tcpout]
defaultGroup = default-autolb-group

[tcpout:default-autolb-group]
server = 10.1.0.100:9997,10.1.0.101:9997
More info about load balancing: http://docs.splunk.com/Documentation/Splunk/latest/Forwarding/Setuploadbalancingd#How_load_balancing_works
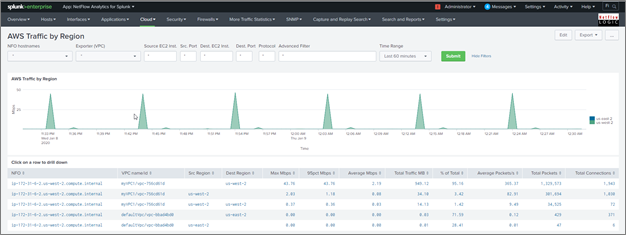
NetFlow Analytics for Splunk App Dashboards for AWS Cloud
AWS Traffic Overview Dashboard
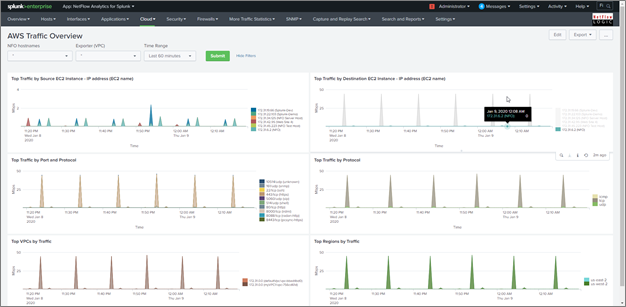
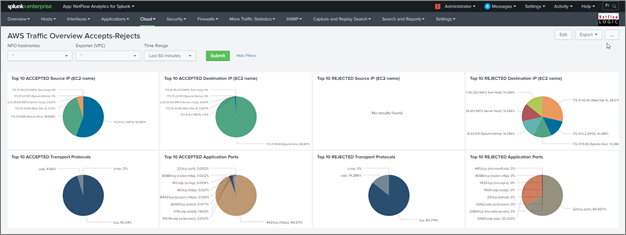
AWS Traffic Overview Accepts-Rejects
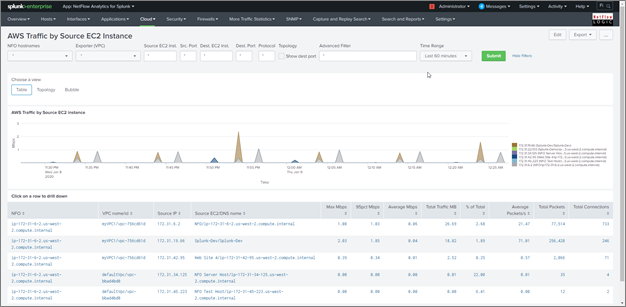
AWS Traffic by Source EC2 Instance
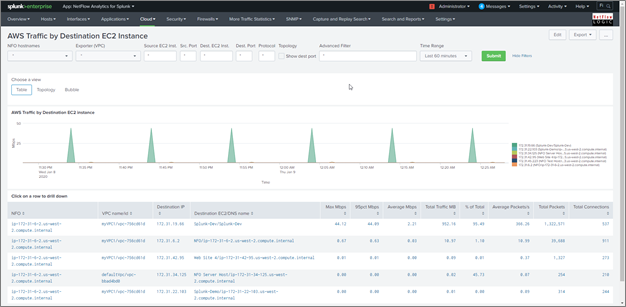
AWS Traffic by Destination EC2 Instance
AWS Traffic by Protocol and Port
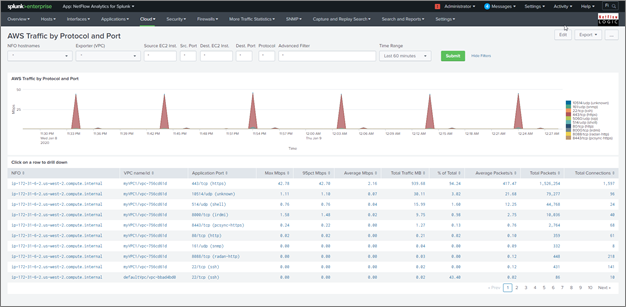
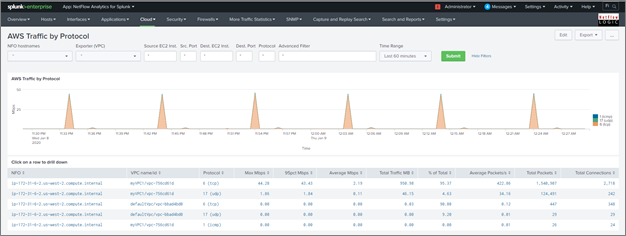
AWS Traffic by Protocol
AWS Traffic by VPC

AWS Traffic by Region
