Installing External Data Feeder for NFO
Starting with release 2.7 both NetFlow Optimizer and EDFN are installed from the same installer.
In certain cases you may need to install EDFN on a separate machine (e.g. in your DMZ) or you may need to install several EDFNs for one NFO instance (e.g. EDFN-1 installed with NFO feeding data from VMWare environment, EDFN-2 in DMZ to feed GeoIP from Maxmind and security threat lists, and EDFN-3 on Windows connecting to your Active Directory Domain controllers to provide login events for user name enrichment).
If you need only one EDFN installed with NFO, you can skip this section.
Disabling Default EDFN instalation
If you are going to install EDFN separately from NFO, you may need to disable default EDFN installation.
Procedure
Go to the default EDFN directory /opt/nfi-updater and perform the following:
./register_daemon.sh -u
Linux RPM Installation
Download the External Data Feeder for NFO RPM package.
Procedure
To begin the RPM installation of External Data Feeder for NFO in the default directory /opt/nfi-updater perform the following:
Open a shell prompt and enter the following command to begin the installation
rpm –ihv <RPM-package>
To begin the RPM installation of External Data Feeder for NFO in another directory, perform the following:
Open a shell prompt and enter the following command to begin the installation
rpm –ihv --relocate /opt=<new-path> <RPM-package>
A message will display indicating that the External Data Feeder for NFO installation has been successfully completed.
Linux TAR Installation
Download the External Data Feeder for NFO TAR package.
Procedure
To begin the TAR installation of External Data Feeder for NFO in the default directory /opt/nfi-updater perform the following:
- Open a shell prompt and enter the following command to un-compress the installer
tar zxvf <TAR-package> -C /opt/nfi-updater - Go to the /opt/nfi-updater directory and enter the following command to begin the installation
setup.sh -i
To begin the TAR installation of External Data Feeder for NFO in another directory, perform the following:
- Open a shell prompt and enter the following command to un-compress the installer
tar zxvf <TAR-package> -C <directory> - Go to the directory and enter the following command to begin the installation
setup.sh –i
A message will display indicating that the External Data Feeder for NFO installation has been successfully completed.
Windows Installation
Download the External Data Feeder for NFO Windows installation package.
Procedure
To begin the Windows installation of External Data Feeder for NFO perform the following:
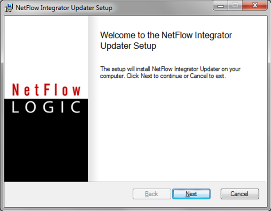
- Open the installation file and click ‘Run’ to launch the installer and Click ‘Next’ To begin the ‘External Data Feeder for NFO Setup’
- Click ‘Next’ to install External Data Feeder for NFO in the default location: C:\Program Files\NetFlow Logic\NetFlow Integrator Updater
- Click on ‘Install’ To begin the installation (follow the installation steps)
- Click on ‘Finish’ to complete the installation and exit the installer
A message will display indicating that the External Data Feeder for NFO installation has been successfully completed.
EDFN Installed Separately or Several EDFNs Installations
note
If External Data Feeder for NFO is installed on a separate server, or if you have several EDFNs connected to one NFO, perform the following:
Stop EDFN service
service nfi_updd stopChange
uriparameter in updater.properties file located in/opt/nfi-updater/conf(In WindowsC:\Program Files\NetFlow Logic\NetFlow Integrator Updater\conf) to IP address of NetFlow Optimizeruri = https://<nfo-host>:8443If this is your second EDFN instance, set a unique EDFN identifier in
uiduid = EDFN_2Change NFO tomcat configuration:
Stop NFO tomcat service
Edit
/opt/flowintegrator/tomcat/conf/web.xmlfile (In Windows%NFO_HOME%\tomcat\conf\web.xmlfile)Change
cors.allowed.originsparameter value to include all EDFNs.If you have one EDFN installed in DMZ, change
http://localhost:8443tohttp://<nfo-host>:8443.<init-param>
<param-name>cors.allowed.origins</param-name>
<!-- <param-value>http://localhost:8443</param-value> -->
<param-value>http://<nfo-host>:8443</param-value>
</init-param>If you have several EDFNs, specify all of them, comma separated, e.g.
<init-param>
   <param-name>cors.allowed.origins</param-name>
   <!-- <param-value>http://localhost:8443</param-value> -->
   <param-value>http://localhost:8443,http://<nfo-host>:8443</param-value>
</init-param>Where
<nfo-host>is exactly the same string as in theupdater.propertiesof your EDFNs configuration.note
Use
http, nothttpsin the web.xml property, it is not a typo - secure communication will be used.Start NFO tomcat service.
What to do next
- Verify that NetFlow Optimizer and External Data Feeders for NFO are connected. In NFO GUI go to External Data Feeders on the left navigation bar
- Change default External Data Feeders for NFO user’s password. Login into NetFlow Optimizer using updater/changeme credentials and change the password. See Authentication Configuration section in EDFN Administration Guide for more information.
- If you require Proxy Server authentication before External Data Feeder for NFO can access external URLs, see Proxy Server Configuration section in EDFN Administration Guide for further instructions.
- If you installed two or more EDFNs and would like to select agents per EDFN, see EDFN Agents Configuration section in EDFN Administration Guide for further instructions.