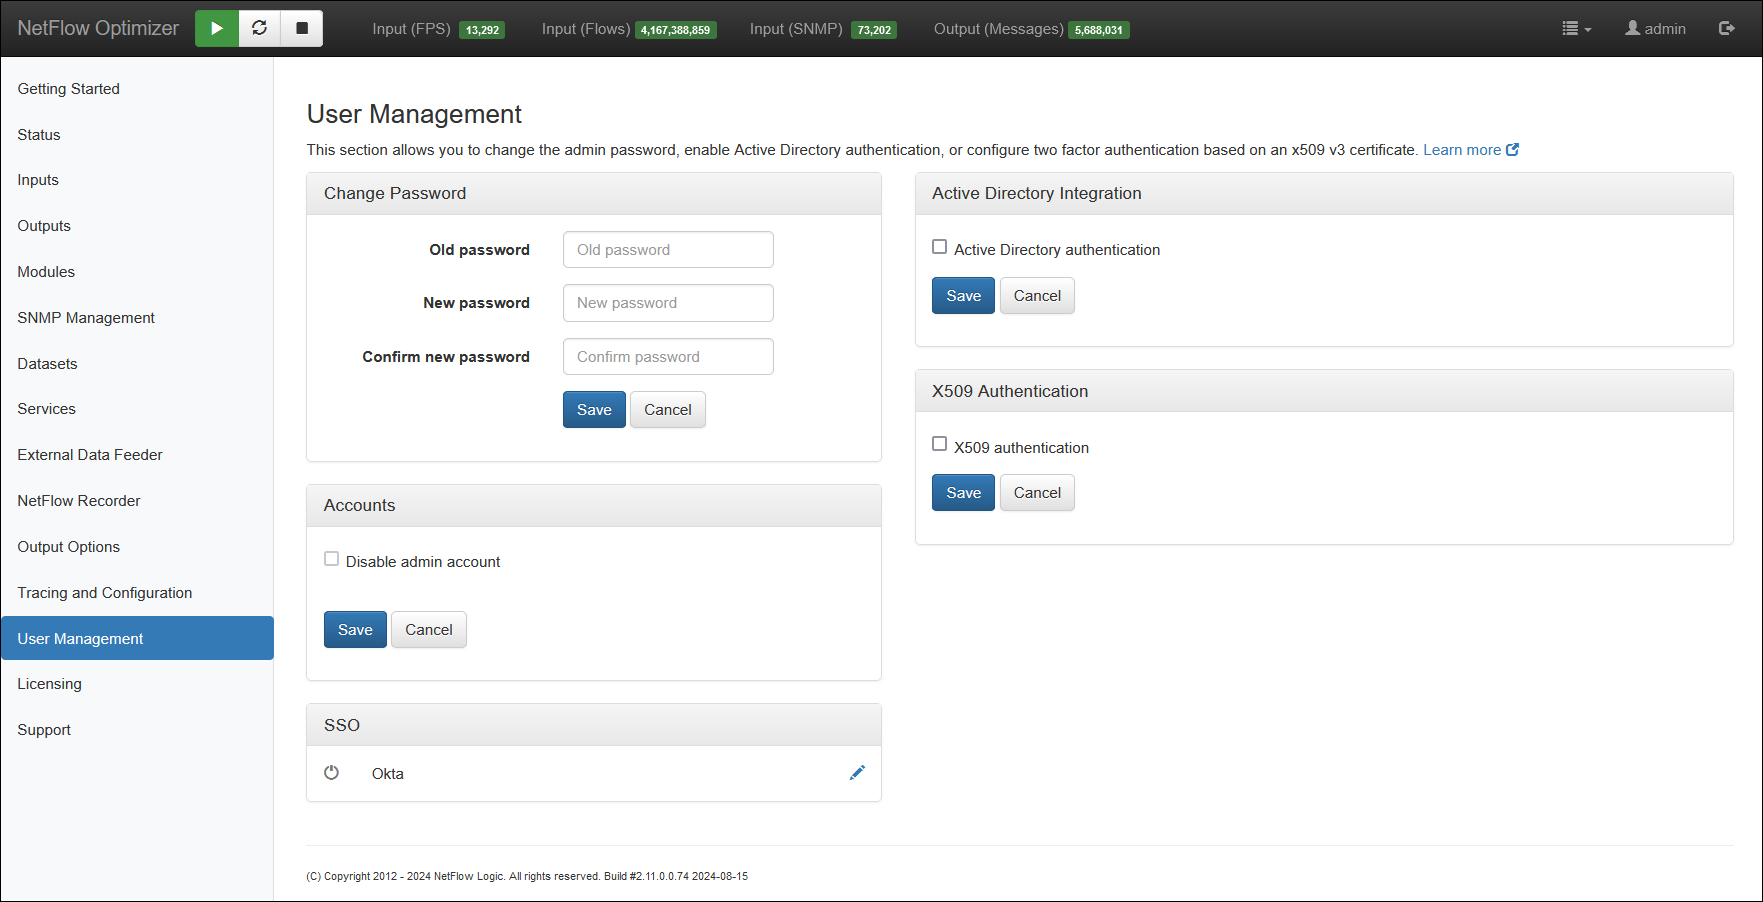
User Management
This page allows you to manage user access and authentication methods. Configure options include changing the admin password, enabling Active Directory authentication, enabling Okta Single Sign-On (SSO), or setting up two-factor authentication based on x509 v3 certificates.
Forgot Password and Restore Admin Account
In order to reset admin password or restore admin account in case you disable it after AD integration - you will require root or administrator access to the system where NetFlow Optimizer is installed. The password will be reset back to changeme or Instance ID in case you deployed NFO in cloud. To reset admin login password perform the following:
- Go to the directory where the password file is stored
Linux: /opt/flowintegrator/tomcat/data
Windows: C:\Program Files\NetFlow Logic\NetFlow Optimizer\tomcat\data
-
Delete the following file:
nf2sl_password -
Restart NFO Tomcat service
Linux:
systemctl -l restart tomcat_nfo.service.Windows: Restart NFO Tomcat using Windows Services.
Active Directory Authentication
Procedure
-
Select
Active directory authenticationcheck box -
Click on
Add AD Serverbutton
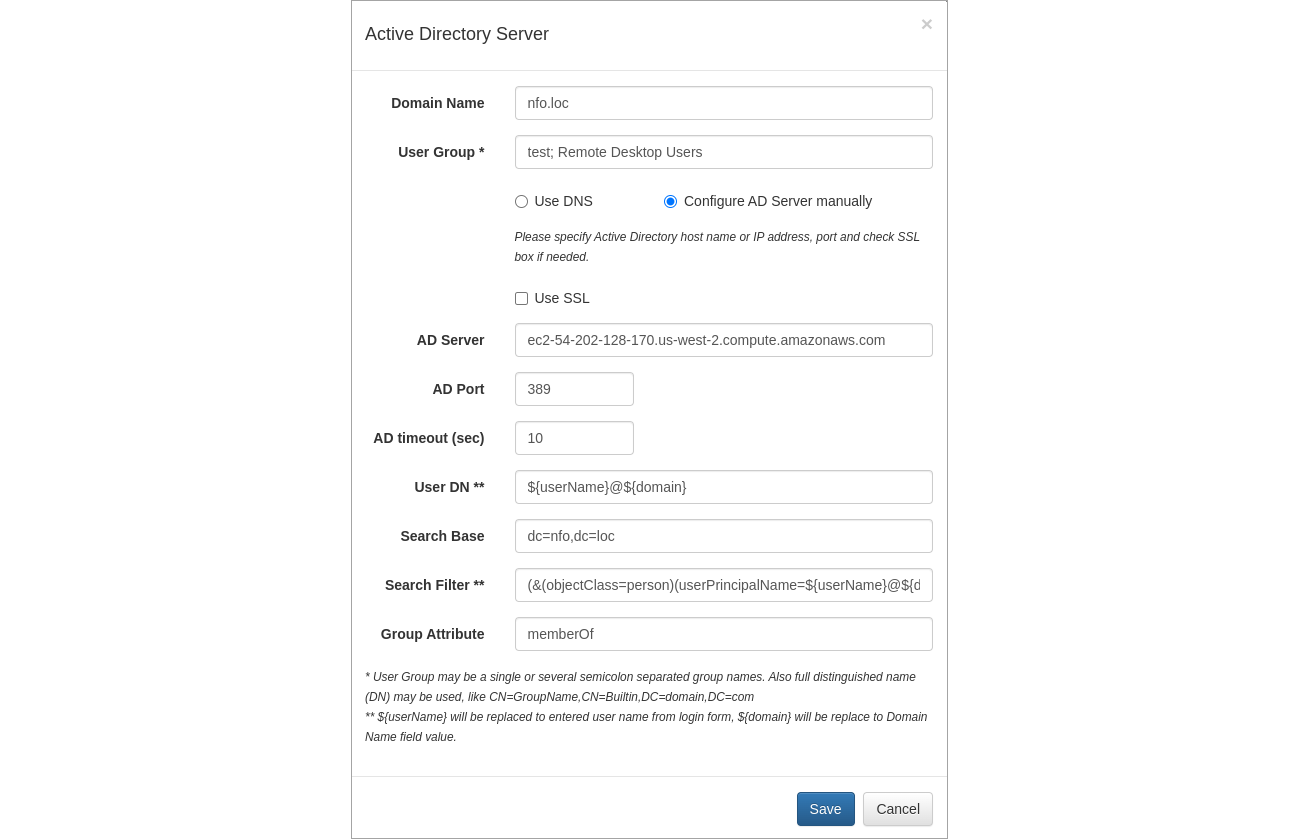
- Specify Domain Name
- Specify User Group or Groups
- Select “Use DNS” or “Configure AS Server manually”
- Check “Use SSL” if needed
- If “Configure AS Server manually” is selected, specify AD host name or IP address
- Specify AD port
- Press ‘Save’ button to save your settings
The following steps are required if SSL is enabled:
- Import AD certificate or root CA into Java Runtime trusted keystore. Keystore has default password changeit.
Linux
/opt/flowintegrator/java/jre/bin/keytool -import -trustcacerts -alias ADName -file AD.crt -keystore /opt/flowintegrator/java/jre/lib/security/cacerts -storepass changeit
Windows
C:\Program Files\NetFlow Logic\NetFlow Optimizer\java\jre\bin\keytool.exe -import -trustcacerts -alias ADName -file AD.crt -keystore C:\Program Files\NetFlow Logic\NetFlow Optimizer\java\jre\lib\security\cacerts -storepass changeit
Where ADName and AD.crt are certificate name and file name respectively.
- Restart NFO Tomcat if certificate has been imported.
- Linux:
systemctl -l restart tomcat_nfo.service. - Windows: Restart NFO Tomcat using Windows Services.
For troubleshooting please check error messages in NFO GUI and/or log file logs/nf2sl.log. Logs trace level can be changed in this file /opt/flowintegrator/tomcat/webapps/ROOT/WEB-INF/classes/log4j2.xml. Uncomment the following line:
<Logger name="com.netflowlogic.nf2sl.service.security" level="trace"/>
Restart NFO Tomcat after changing trace level. Login again using AD user.
Okta Single Sign-On (SSO)
Procedure
To configure Okta SSO, follow these steps:
In Okta
- Open Okta Admin Console
- Navigate to Applications > Applications in the left panel
- Click
Create App Integrationbutton - In the opened wizard select "OIDC - OpenID Connect" as a sign-in method and "Web Application" as the application type
- Complete the New Web App Integration form:
- Enter Application integration name
- Specify the Sign-in redirect URI:
https://<host>:8443/oauth2/callback(obtainable from the NFO User Management page > Okta configuration dialog box, Redirect URI parameter) - Configure Controlled access settings
- Click
Save
- Copy Client ID and Client secret from the application's General page.
In NFO
- Click on
edit(pensil icon) button in Okta SSO panel
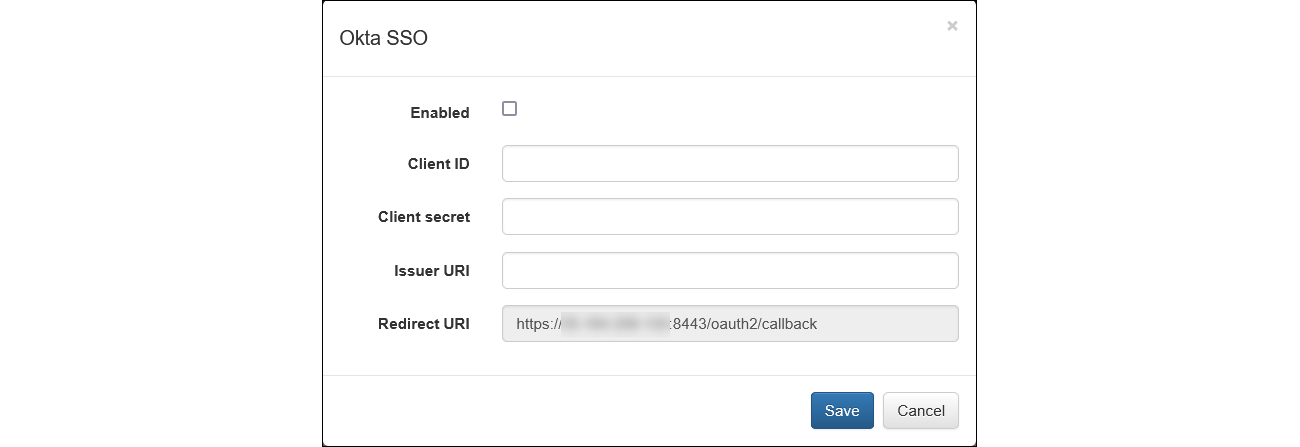
- Paste the Client ID and Client secret from the okta into the respective fields
- Enter the Issuer URI:
httsp://<your-okta-domain> - Note that the Redirect URI parameter is non-editable and must match the value used in the Okta configuration
- Click
Saveto apply your settings
Two Factor Authentication (2FA)
If your organization requires Two Factor Authentication to support certificate policies for administrators, you can configure it using x509 Authentication panel.
-
Select
X509 authenticationcheck box -
Click on
Add AD Serverbutton
- Enter required parameters
Please contact support@netflowlogic.com if you need further assistance.